Adding Rooms
The Room section allows you to set up any space that may be requested for an event. By adding rooms, you are establishing a listing of spaces that will appear for the end user to select from when submitting their request.
How to Add Rooms
- Click on the Add link in the Actions menu at the top of the screen.
- Click on the Rooms link.
-
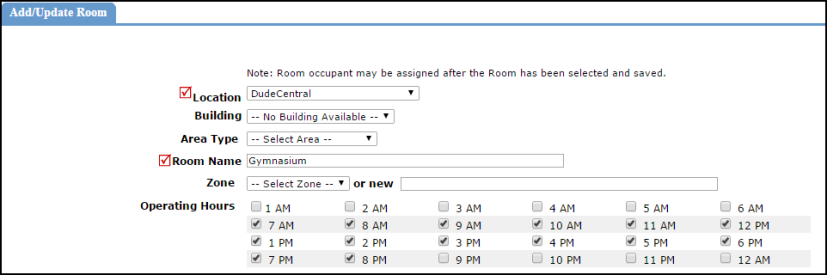
The only required fields when adding a room are Location and Room Name.
-
Although Building and Area Type are not required, they act as a filter when selecting rooms on the schedule request form. You may or may not use these fields depending on the needs of your organization. *Note: If you are planning to use Fee Tables for invoicing, you will need to assign an Area Type to every Room.
-
Operating Hours can be set for all rooms on the Account Settings page. You can alter the hours for each individual room by checking or unchecking the boxes next to the time on the Room screen.
-
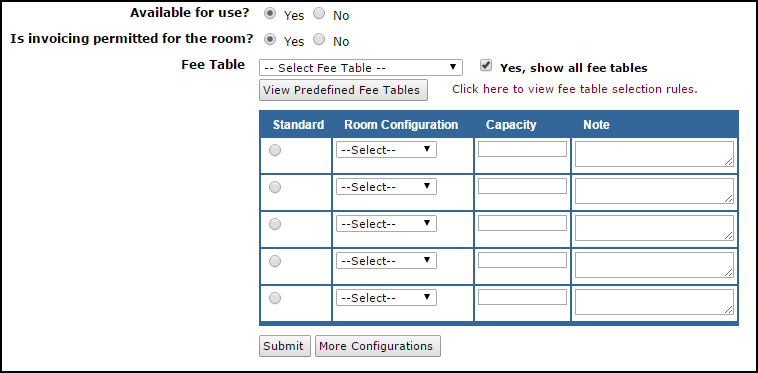
Available for Use: The default setting is Yes. However, you may need to hide a space from being an available selection on the schedule request form. You can do this by selecting No. This can be a temporary or permanent selection for the room.
-
Generally, you will want to leave the Invoicing Permitted for the Room and Fee Table selections as the default settings. In order to select a Fee Table, you will need to create them first. *Note: As a best practice suggestion, we do not recommend assigning a Fee Table to a room.
-
The Room Configuration box allows you to indicate how the space can be used (for assembly purposes, concert, etc.). You can list the capacity for each possible configuration and add any additional notes. A user has the ability to view this information when they are filling out a schedule request form.
- Click Submit.
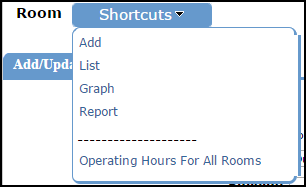
- Once you have added a room, hover your mouse over the Shortcuts menu toward the top of the screen.
- Click Add to bring up a new screen to add the next room.
- If you would like to see your listing of existing rooms that have already been entered in the account, click on List.